Installation
This guide comes with a Vagrantfile which configures and installs
a basic three-node HA cluster running Pacemaker and Hawk. This is the
cluster that will be used in the rest of this guide.
Make sure that you have a fairly recent version of Vagrant [1] installed together with either VirtualBox or libvirt as the VM host. To use libvirt, you may need to install the bindfs [3] plugin for Vagrant. For more details on how to install and use Vagrant, see https://www.vagrantup.com/ .
To begin setting up the example cluster, use git to check out a
copy of the source repository for this guide:
$ git clone --recursive git@github.com:krig/hawk-guide
Now let Vagrant configure a virtual machine [2] running Hawk:
$ cd hawk-guide
$ vagrant up alice
If everything goes as it should, Vagrant will go off and do its thing, downloading a base VM image and installing all the necessary network configuration and software packages that we’ll need. Once the installation finishes, a VM running Pacemaker and Hawk should start up.
The Vagrantfile can configure three VMs: alice, bob1 and
bob2. So far we’ve only configured alice, but once you have
confirmed that the installation was successful you can also start the
other two VMs using vagrant up:
$ vagrant up bob1
$ vagrant up bob2
Make sure Hawk is running by logging into the alice VM and running
the following commands:
$ vagrant ssh alice
(alice) $ sudo chkconfig hawk on
(alice) $ sudo service hawk start
Logging in
To view the Hawk web interface, open this URL in your web browser: https://localhost:7630/

Connecting to port 7630 on localhost should work for the above
described installation method, since the Vagrantfile also forwards
port 7630 from the virtual machine. If you installed Hawk on a
different machine than the one you are currently using, you will need
to connect to port 7630 on that machine instead.
You may see a prompt warning you about an unverified SSL certificate. By default, Hawk generates and presents a self-signed certificate which browsers are understandably sceptical about.
Once you have accepted the certificate, you will be faced with a
username and password prompt. Enter hacluster as the username and
linux as the password. This is the default identity as configured by
the HA bootstrap script. Naturally, you would want to change this
password before exposing this cluster to the wider world.
A note on fencing
After logging in, the Status view of Hawk should appear, looking something like the image below.
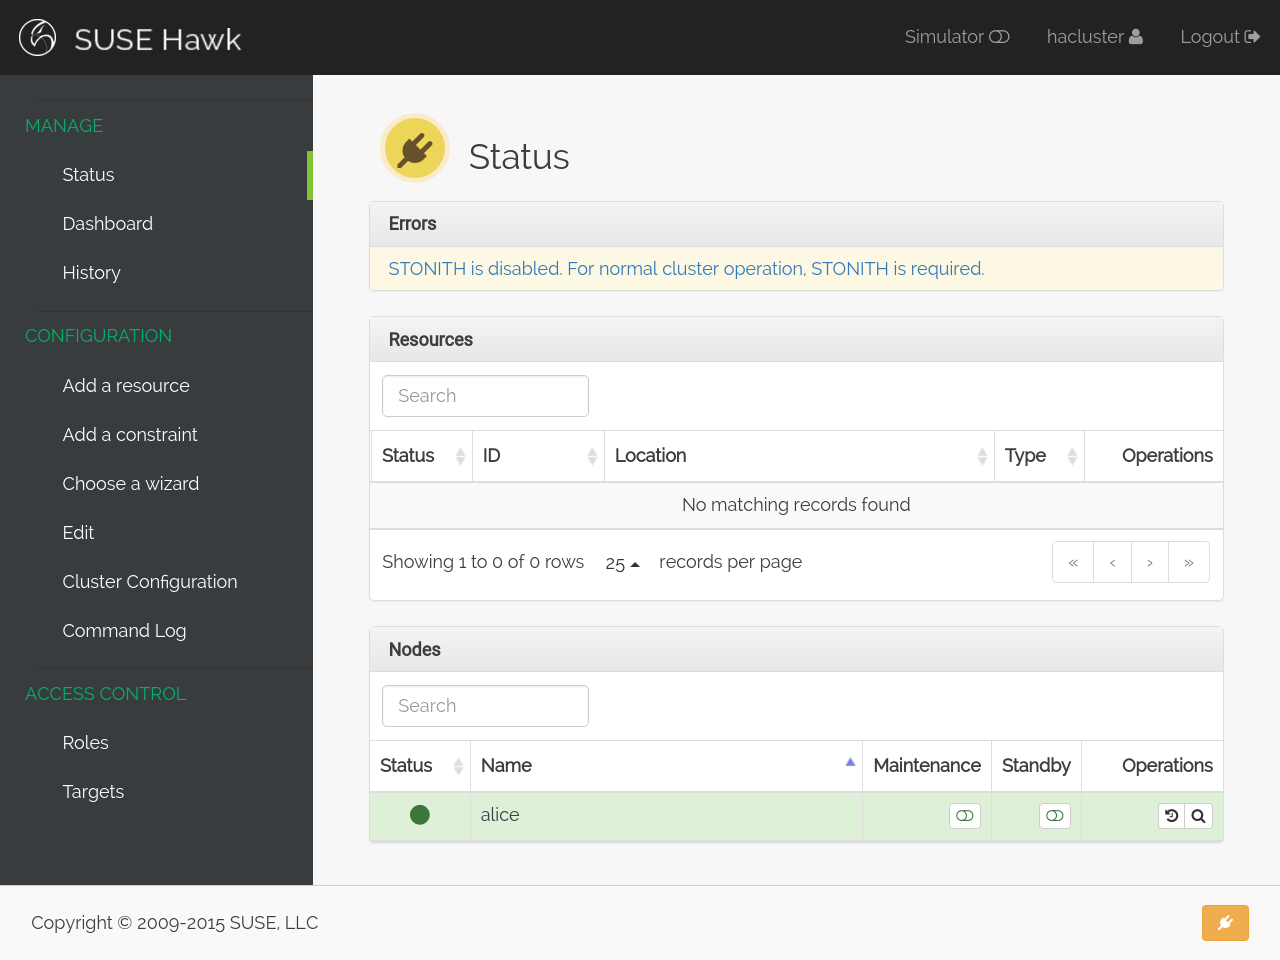
Notice that the status is yellow (meaning warning), and that there is an error reported:
STONITH is disabled. For normal cluster operation, STONITH is required.
STONITH, or fencing, is an essential element in any production cluster. When a node stops communicating or gives conflicting information to its peers, the other nodes need some way to ensure that the misbehaving node isn’t running resources it shouldn’t be. Examples of this kind of failure are network outages or a failed stop action.
The mechanism used by Pacemaker to handle these kinds of failure is usually referred to as fencing or STONITH [4].
Any production cluster needs fencing. However, fencing can be complex to configure, especially in an automatic fashion. There are fencing agents available for both libvirt and VirtualBox, and there is also a form of fencing which relies on shared storage called SBD [5].
To learn how to configure an actual fencing device for this cluster and get rid of that warning, see Configuring fencing.
Footnotes
| [1] | https://www.vagrantup.com/ |
| [2] | This command lets Vagrant decide which virtualization
provider to use. To select a provider manually, pass
--provider=libvirt|virtualbox|... parameter to
vagrant up. |
| [3] | https://github.com/gael-ian/vagrant-bindfs |
| [4] | Shoot the Other Node in the Head. |
| [5] | https://github.com/ClusterLabs/sbd |